
Training Guide 2026
This guide covers everything a writer needs to clean up, optimize, and quality-check a WordPress dental blog. Work through each section in order. One-time setup tasks are marked (Once Per Site). Per-post tasks repeat on every visit.
Prerequisites
Download and activate SEO Meta in 1 CLICK

1. Comments + Default Content Cleanup (Once Per Site)
Before doing anything else, clear out WordPress default junk and disable comments site-wide.
Step 1 — Delete Existing Comments
- Go to: Comments
- Select all comments
- Delete ALL comments
Step 2 — Disable Comments (Standard)
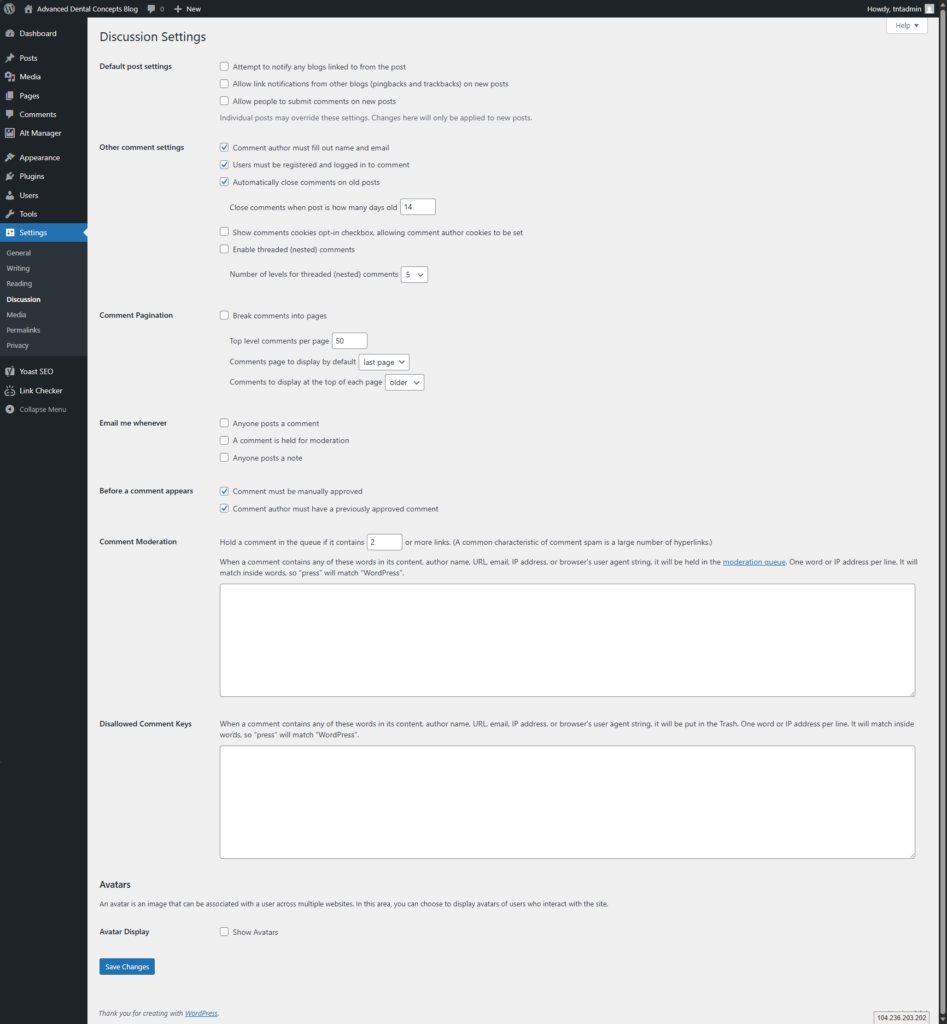
- Go to: Settings → Discussion
- Every checkbox on this page should be unchecked with the following exceptions:
- Comment author must fill out name and email
- Users must be registered and logged in to comment
- Automatically close comments on old posts
- Comment must be manually approved
- Comment author must have a previously approved comment
- Click Save Changes
Step 3 — Remove Default Content
- Delete the “Hello World” post
- Delete the “Sample Page”
✅ Section 1 Checklist
- ☐ All comments deleted
- ☐ Discussion settings → all but 5 checkboxes OFF
- ☐ “Hello World” post deleted
- ☐ “Sample Page” deleted
2. Permalinks (Check Only)
Confirm the site is not using ugly ?p=123 URLs. This is a check — only change if broken.
- Go to: Settings → Permalinks
- If URLs look like
/blog/?p=123→ select Post name → click Save Changes - If anything else is selected → do not change it
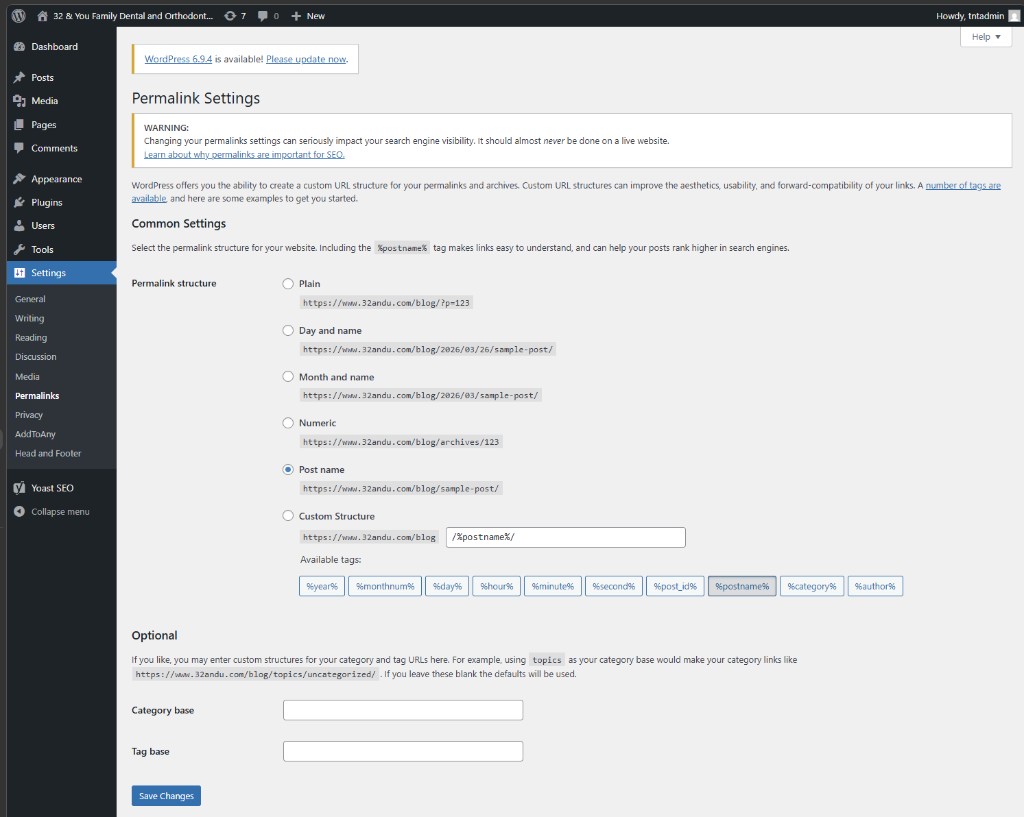
Post name selected — this is the correct setting. If you see Plain selected instead, change it to Post name and save.
✅ Section 2 Checklist
- ☐ Permalinks checked
- ☐ Not using
?p=123(Plain)
3. Yoast Plugin Setup (Once Per Site)
- Confirm Yoast SEO is installed and active
- Update the plugin to the latest version
- Enable auto-updates for Yoast — click Enable auto-updates on the right side of the Plugins list
- Import the standard Yoast settings file (see below)

Click Enable auto-updates on the right side of the Yoast SEO row in the Plugins list.
How to Import Yoast Settings
- Go to: Yoast SEO → Tools → Import and Export
- Click the Import settings tab
- Paste the configuration below into the text area
- Click the Import settings button
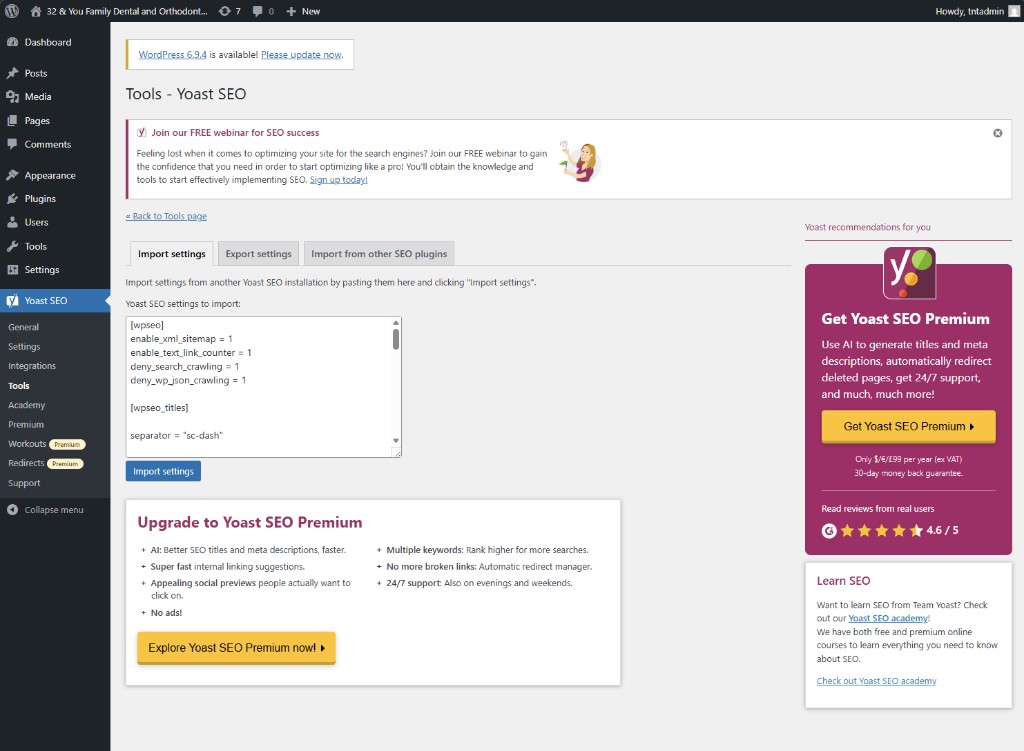
Paste the configuration into the text area, then click Import settings.
Yoast Settings Import File
; Yoast SEO Import Configuration (Safe for Existing Sites)

[wpseo]
enable_xml_sitemap = 1
enable_text_link_counter = 1
deny_search_crawling = 1
deny_wp_json_crawling = 1

[wpseo_titles]
separator = "sc-dash"
title-home-wpseo = "%%sitename%% %%page%% %%sep%% %%sitedesc%%"
title-post = "%%title%% %%sep%% %%sitename%%"
metadesc-post = "%%excerpt%%"
title-page = "%%title%% %%sep%% %%sitename%%"
metadesc-page = "%%excerpt%%"
noindex-author-wpseo = 1
noindex-archive-wpseo = 1
disable-author = 1
disable-date = 1
disable-post_format = 1
disable-attachment = 1
breadcrumbs-enable = 1

[wpseo_social]
twitter = 1
twitter_card_type = "summary_large_image"

[wpseo_advanced]
remove_feed_global = 1
remove_feed_global_comments = 1
remove_feed_authors = 1
remove_feed_categories = 1
remove_feed_tags = 1
remove_feed_post_types = 1
remove_feed_search = 1
remove_shortlinks = 1
remove_rest_api_links = 1
remove_rsd_wlw_links = 1
remove_oembed_links = 1
remove_generator = 1
remove_emoji_scripts = 1
remove_pingback_header = 1
✅ Section 3 Checklist
- ☐ Yoast installed and active
- ☐ Plugin updated to latest version
- ☐ Auto-updates enabled
- ☐ Yoast settings imported
4. Add Missing Meta Descriptions and Repair Duplicate Article Titles
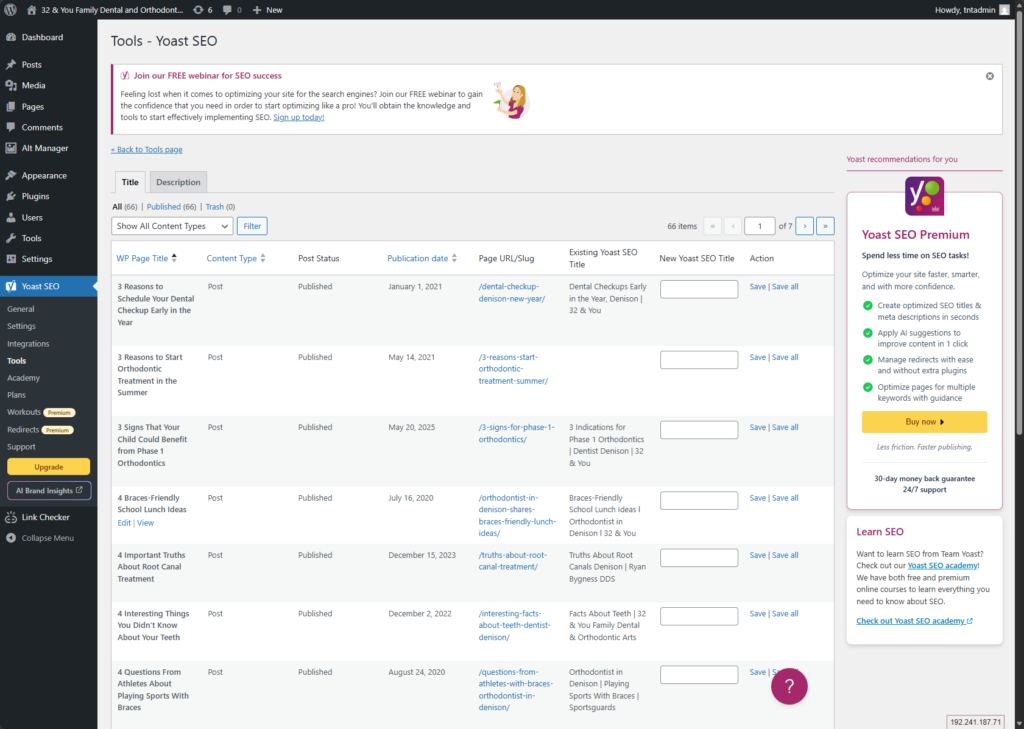
Bulk Editor – Descriptions
The Yoast Bulk Editor lets you see and edit all meta-Descriptions on one screen — much faster than opening each post individually.
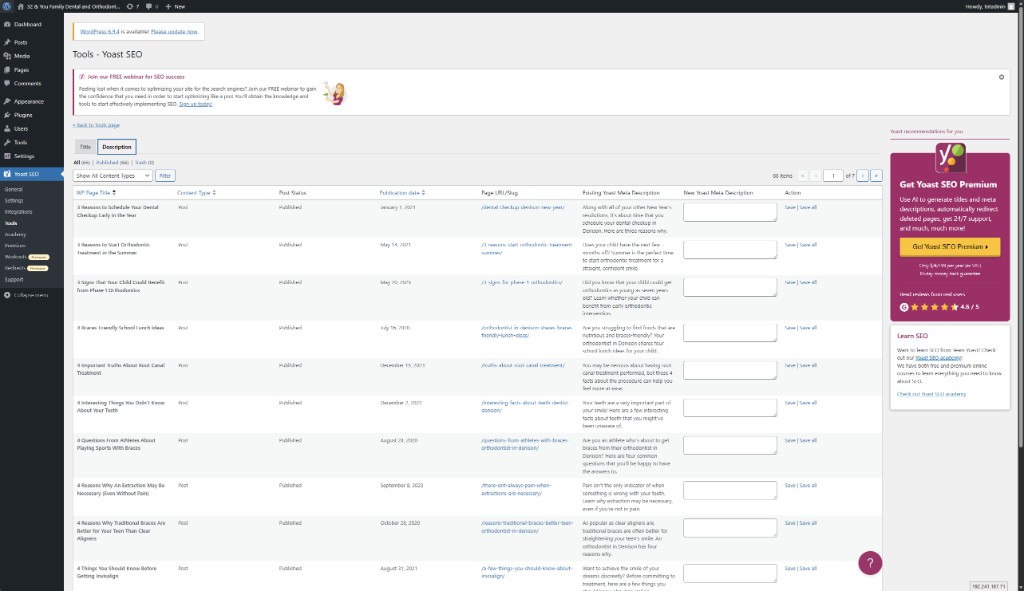
- Go to: Yoast SEO → Tools → Bulk Editor
- Click the Description tab
- Any post with an empty Your Yoast Meta Description field is missing a description
- Click in the empty field, type the description, then click Save
The Description tab in Yoast Tools shows every post. Empty fields on the right need a meta description added.
Meta Description Guidelines
- 140–160 characters
- Clear and readable — written for a human, not a search engine
- Describes the page content + patient benefit
- No keyword stuffing
Bulk Editor – Repair Duplicate Article Titles
The Yoast Bulk Editor lets you see and edit all meta-Titles on one screen — much faster than opening each post individually.
Compare WP Page Title in the first column to the Existing Yoast SEO Title in the 6th column. Do they match – exactly? If so, create a New Yoast SEO Title in the blank box next to Existing Yoast SEO Title and click “Save”.
- Go to: Yoast SEO → Tools → Bulk Editor
- Click the Titles tab
- Update any entry where the WP Page Title exactly matches the Existing Yoast SEO Title
- Click in the empty New Yoast SEO Title, type in a new title or leave it empty then click Save
✅ Section 4 Checklist
- ☐ All posts reviewed for missing meta descriptions
- ☐ Meta description added to each post (140–160 characters)
- ☐ SEO title present on each post
5. Blog Home Page Meta Description (/blog/ page)
Step 1 — Identify the Blog Page
- Go to: Settings → Reading
- Look for the “Posts page” field — this is your
/blog/page
Step 2 — Set the Meta Description
Primary path:
- Go to: Yoast SEO → Settings → Content Types → Posts Page
(Older UI: Search Appearance → General / Content Types) - Find the Posts page (Blog page) section
- Add your meta description in the field provided
Alternative path (if not visible above):
- Go to: Pages → All Pages
- Open the page assigned as “Posts page”
- Scroll to the Yoast SEO box and add meta description there
Quick Reference — Where to Edit Meta by Page Type
| Page Type | Where to Edit Meta |
|---|---|
| Blog posts | Inside each post (Yoast box) |
| Pages | Inside each page (Yoast box) |
| /blog/ (posts page) | Yoast Settings only — not the normal editor |
✅ Section 5 Checklist
- ☐ Posts page identified in Settings → Reading
- ☐ Meta description added via Yoast → Posts Page settings
6. Blog Link Check (Homepage)
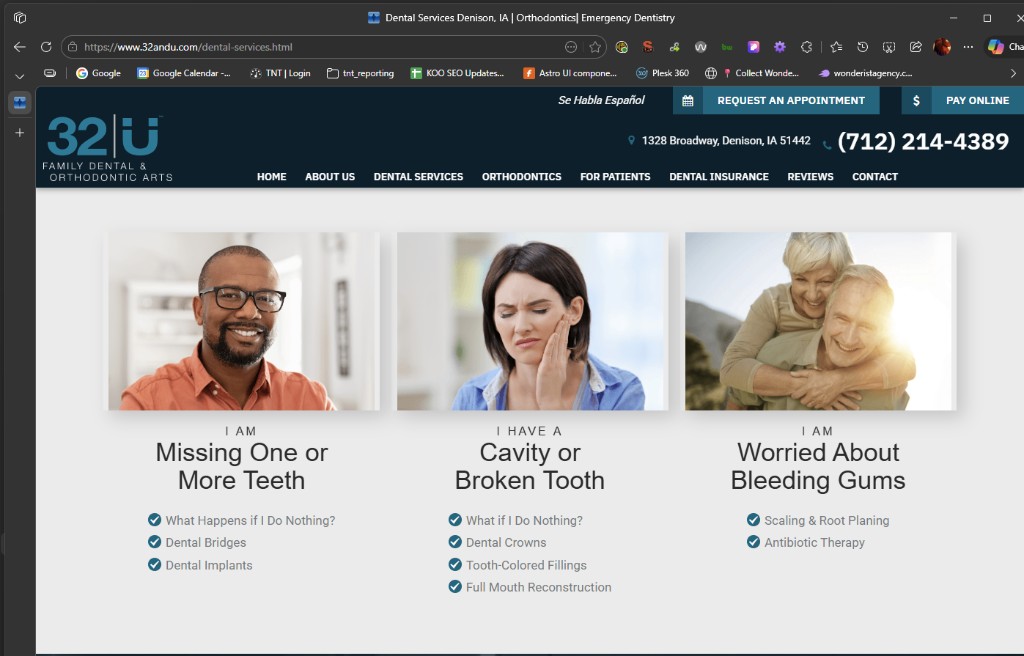
Verify the Blog link on the homepage points to the correct, secure URL. Hover and look in the lower left corner to view the “Blog” URL or use SEO Meta in 1 CLICK.
Quick Rule: If it’s not exactly /blog/ on the correct domain using HTTPS → it’s wrong.
✅ Section 6 Checklist
- ☐ Blog link from homepage is correct (
https://www.domain.com/blog/) - ☐ If incorrect → ticket submitted with current URL and correct URL
7. Duplicate Title Tag Check
Confirm the site only has one <title> tag. A duplicate title tag causes SEO issues.
How to Check
- Open the /blog/ home page
- Right-click → View Page Source
- Press Ctrl+F and search for:
<title> - There should be exactly one result

Example of the Problem
<title><?php wp_title('»', true, 'right'); ?></title>
<title>32 & You Family Dental and Orthodontic Arts Blog</title>
How to Fix
- Go to: Appearance → Theme File Editor → header.php
- Find the static (hard-coded) title tag
- Comment it out as shown below
<!-- <title>32 & You Family Dental and Orthodontic Arts Blog</title> -->If You Cannot Edit Theme Files
Open a ticket. Include the site URL and note: duplicate title tag found.
✅ Section 7 Checklist
- ☐ Only ONE
<title>tag exists in page source - ☐ Static title removed or commented out
- ☐ Yoast controls the title
8. Broken Links (Once Per Site + Ongoing)
Install the Plugin (Once Per Site)
- Go to: Plugins → Add New
- Search: broken — select Broken Link Checker (first result, by WPMU DEV)
- Click Install Now
- Click Activate when it appears
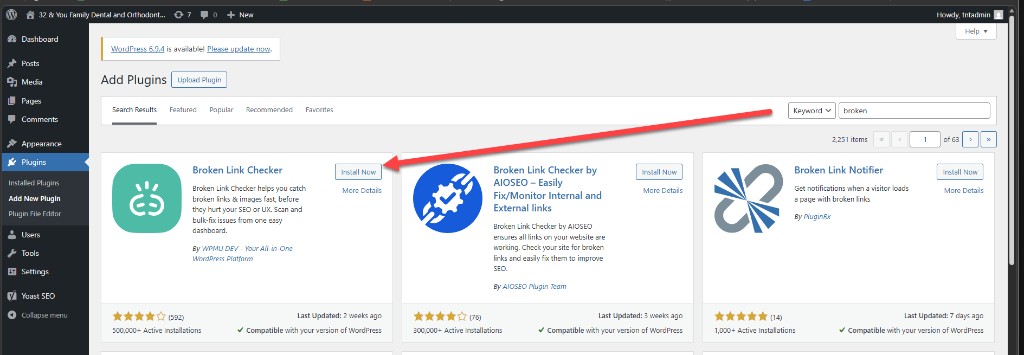
Search for broken — click Install Now on the first result (Broken Link Checker by WPMU DEV).
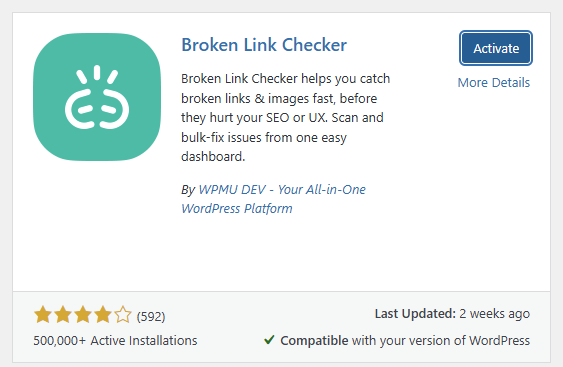
After installing, click Activate.
How to Fix Broken Links
- Go to: Link Checker → Local [old] in the left menu
- Review all flagged links and choose a fix option below
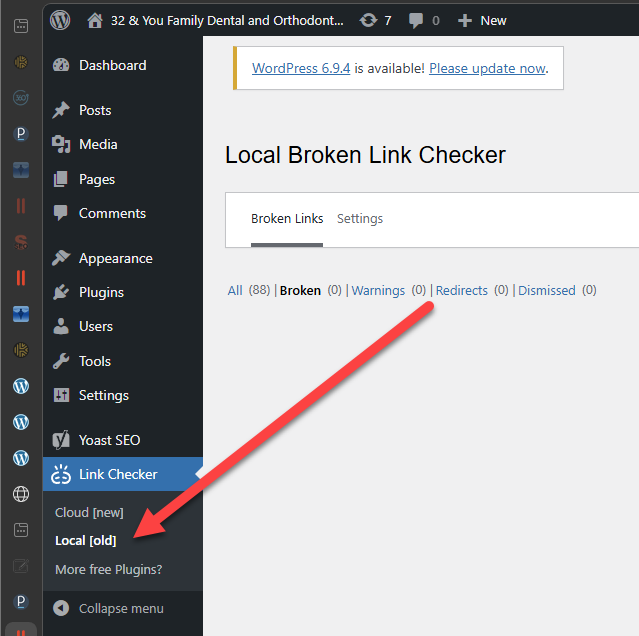
Go to Link Checker → Local [old] to see all broken links, warnings, and redirects.
You have 3 options when dealing with link repair:
- Option A — Edit URL (Preferred)
- Option B — Unlink
- Option C — Dismiss (phone numbers for example)
⚠️ Don’t Ignore the Redirects Tab
Click the Redirects tab in Local Broken Link Checker to see all redirected links. For each one:
Keep the client’s Services page open in a separate tab — hover any link to grab the correct final URL quickly.
- Click Edit URL under the redirected link
- An Edit Link panel opens inline — the Text field will say (Multiple links) if the same URL appears in more than one post
- Replace the URL in the URL field with the final destination URL (the page it actually lands on)
- Click Update
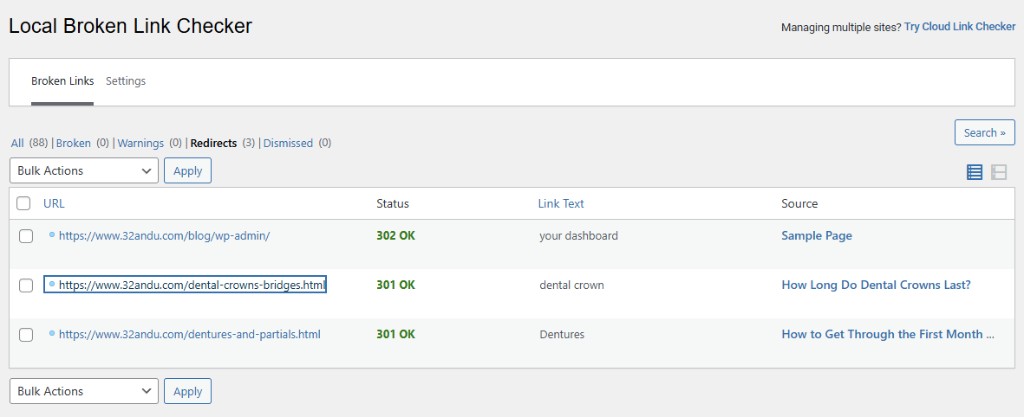
The Redirects tab shows links that technically work but chain through a redirect. Each one should be updated to point directly to the final URL.
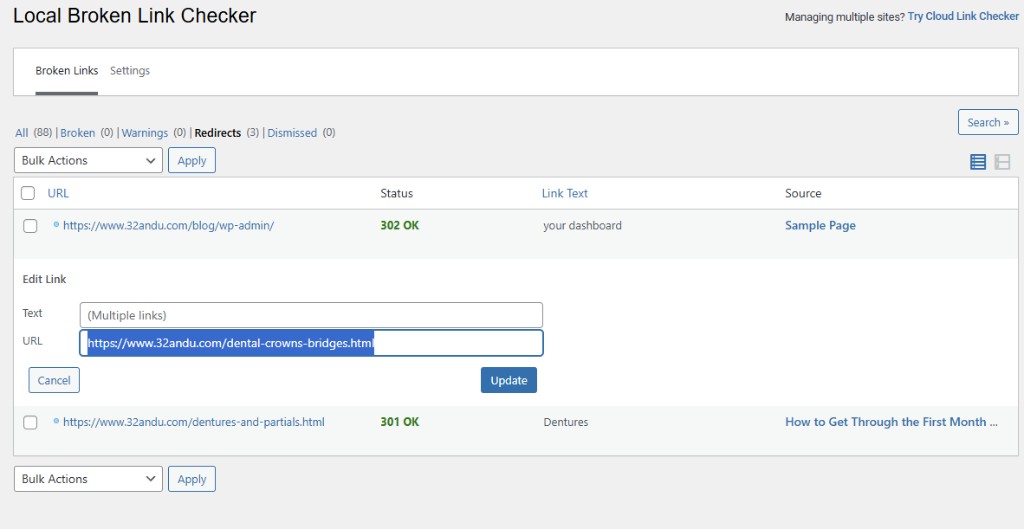
(Multiple links) in the Text field means this redirect appears in more than one post. One click of Update fixes them all at once.
💡 Bonus — Trash the Sample Page from Here
Look for a 302 redirect with Source: Sample Page. Hover over the Source link to reveal the Trash option and remove it in one click.
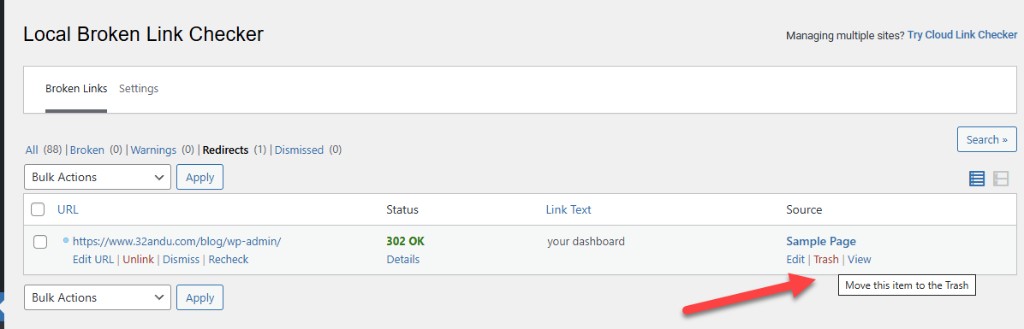
The Sample Page shows up as a redirect — hover the Source link and click Trash to remove it without leaving the screen.
✅ Section 8 Checklist
- ☐ Broken Link Checker installed and active
- ☐ All broken links reviewed
- ☐ Broken internal links fixed
- ☐ Broken external links removed or updated
9. Image Library + ALT Text
- Download and save plugin linked below and save the file on your desktop or your downloads folder for easy reference later
- Open WordPress
- Go to Plugins | Add Plugin | Upload Plugin
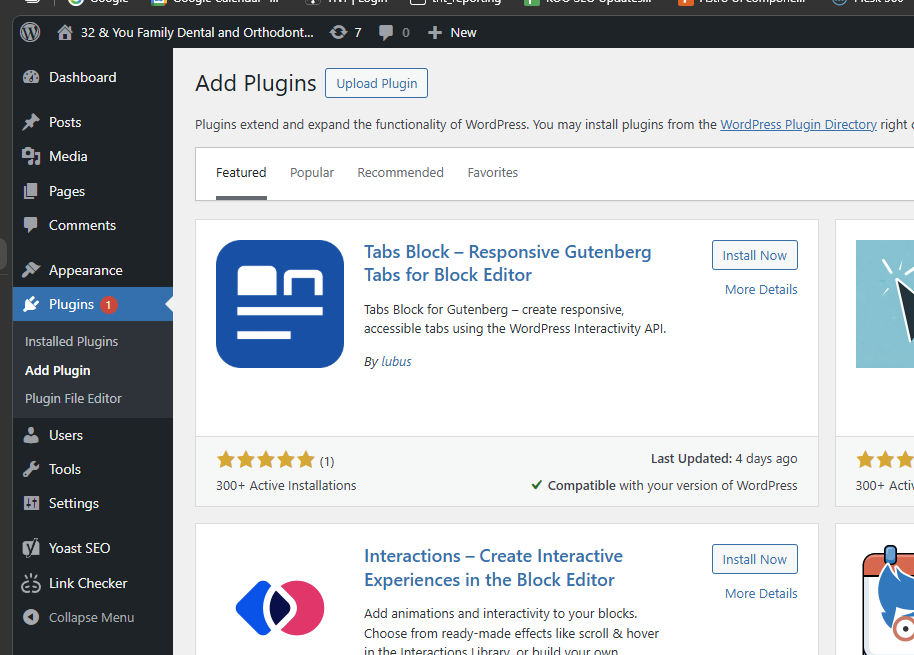
- Choose File | Navigate to where you saved the plugin file, select it and choose “install now”

- The plugin will install and you will have a new tool called Alt Manager on your dashboard
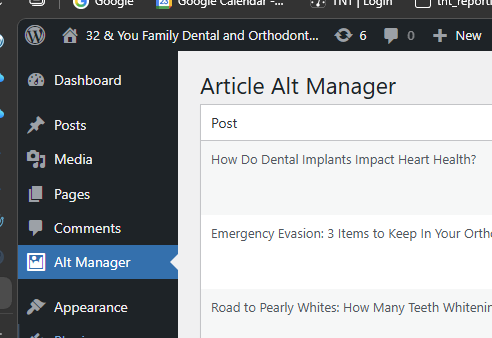
- Look for the Alternative Text field on the right of the grid showing all images used in posts
- Add a short, descriptive ALT text for any images that do not already have alt txt
- Click “Save” after each one you update

ALT Text Guidelines
- Describe what is in the image (e.g., “Dentist examining a patient’s teeth”)
- Keep it short — one sentence or less
- No keyword stuffing
✅ Section 9 Checklist
- ☐ Alt Manager reviewed for missing ALT text
- ☐ ALT text added to all relevant images
Master Checklist — Full Blog Review
Use the link below to submit your completed blog review. The form includes sections to add notes, request support tickets, and flag any items you were unable to resolve or need assistance with.
Last updated: March 2026